Skip to content
Are you ready to add a splash of vibrant colors to your garden? Growing dahlias from seed is a rewarding and cost-effective way to cultivate these stunning flowers. Whether you’re a seasoned gardener or just starting out, this comprehensive step-by-step guide will provide you with all the information you need to successfully propagate dahlias and enjoy their beauty from seed to bloom.
From choosing the right seeds and germination to transplanting and caring for your seedlings, we’ll walk you through each stage of the dahlia propagation process. By following these easy instructions, you’ll be on your way to creating a stunning display of dahlias that will bring joy and beauty to your garden.
So, grab your gardening gloves and let’s get started on this exciting journey of growing dahlias from seed!
How to Grow Dahlias from Seed Key Takeaways:
- Propagating dahlias from seed is a cost-effective way to grow these beautiful flowers.
- Choose the right seeds for successful dahlia propagation.
- Start dahlias from seed indoors to get a head start on the growing season.
- Germination is a crucial step – provide the right conditions for successful sprouting.
- Transplant your seedlings into individual pots before moving them to the garden.
Choosing the Right Dahlia Seeds for Propagation
Before you start growing dahlias from seed, it’s important to select the right seeds for propagation. The quality and characteristics of the seeds will significantly impact the success of your dahlia propagation efforts. Let’s explore the different types of dahlia seeds available and provide some helpful tips on choosing the best ones.
Types of Dahlia Seeds
Dahlia seeds come in various types, including:
- Open-pollinated seeds: These seeds are produced through natural pollination and result in a diverse range of characteristics. They may yield plants with variations in color, size, and form, offering unique possibilities for your dahlia garden.
- Hybrid seeds: Hybrid seeds are the result of controlled pollination between two specific dahlia varieties. They are carefully selected to exhibit desirable traits such as uniformity, disease resistance, or unique color combinations. Hybrid seeds can offer more predictability in terms of the plant’s characteristics.
When choosing dahlia seeds for propagation, it’s essential to consider your specific preferences and goals. Do you want to experiment with different colors and forms, or are you looking for a particular characteristic, such as large blooms or a specific color palette? Knowing what you want to achieve will guide your seed selection process.
Tips for Choosing the Best Dahlia Seeds
Here are some tips to help you choose the best dahlia seeds for successful propagation:
- Research reputable seed suppliers: Look for reputable seed suppliers known for providing high-quality dahlia seeds. Check online reviews and ratings to ensure you’re purchasing from a reliable source.
- Consider the growing conditions: Different dahlia varieties have specific growing requirements, including the amount of sunlight, soil type, and climate preferences. Choose seeds that are suitable for your local growing conditions to increase the chances of successful growth.
- Look for seed quality indicators: When purchasing dahlia seeds, check for indicators of seed quality, such as freshness, plumpness, and absence of mold or pests. High-quality seeds have a better chance of germinating and producing healthy plants.
By following these tips and considering your specific preferences, you’ll be able to choose the right dahlia seeds for successful propagation.
| Dahlia Seed Types | Characteristics |
|---|---|
| Open-pollinated Seeds | Diverse range of characteristics |
| Hybrid Seeds | Controlled pollination, exhibit desirable traits, more predictability |
How to Start Dahlias from Seed Indoors
Starting dahlias from seed indoors is a great way to get a head start on the growing season. By sowing dahlia seeds indoors, you can ensure that your plants have a stronger foundation before transplanting them outdoors. In this section, we will guide you through the process of starting dahlias from seed indoors, providing you with valuable seed starting tips for dahlias.
When to Start Dahlias from Seed Indoors
The ideal time to start dahlias from seed indoors is 6-8 weeks before the last frost date in your area. This will give the seeds enough time to germinate and develop into healthy seedlings. Consulting a local gardening calendar or contacting your local extension office can provide you with the precise timing for your region.
Suitable Containers for Sowing Dahlia Seeds Indoors
When starting dahlias from seed indoors, it is important to choose the right containers for sowing your seeds. Use seed trays or individual pots that have drainage holes to ensure proper water drainage. This will help prevent the seeds from rotting and promote healthy growth. Additionally, make sure the containers are clean and sterilized to minimize the risk of disease.
Ideal Growing Conditions for Germination
Dahlia seeds require specific growing conditions for successful germination. Ensure the following conditions are provided:
- Temperature: Maintain a consistent temperature of around 70-75°F (21-24°C) for optimum germination.
- Moisture: Keep the soil moist but not waterlogged during the germination process. Avoid overwatering, as it can lead to fungal diseases and damping-off.
- Light: While dahlia seeds don’t require light for germination, providing mild bottom heat using a heating mat can promote faster and more consistent germination.
By creating the ideal growing conditions, you will increase the chances of your dahlia seeds germinating and developing into healthy seedlings.
Seed Starting Tip: Label your containers with the variety of dahlia seeds you are sowing. This will help you keep track of the different varieties as they grow.
Now that you have learned how to start dahlias from seed indoors, you can proceed with confidence to the next step: germinating dahlia seeds. In the next section, we will discuss the factors that promote successful germination and how to care for the seedlings during this important stage.
Germinating Dahlia Seeds
Germination is a crucial step in growing dahlias from seed. To ensure successful germination, you need to consider several important factors, including temperature, moisture, and proper seed treatment. By following the seed starting tips for dahlias outlined below, you can increase your chances of achieving successful germination and growing healthy dahlia seedlings.
Temperature
The ideal temperature for germinating dahlia seeds is between 70°F and 75°F (21°C and 24°C). This warmth promotes germination and encourages rapid seedling growth. To maintain a consistent temperature, consider using a seedling heat mat or placing your seed trays in a warm location, such as near a heat source or on top of a refrigerator.
Moisture
Moisture is vital for dahlia seeds to germinate. Ensure that the planting medium is consistently moist, but avoid overwatering, as excessive moisture can lead to rot. To maintain the right moisture level, mist the soil surface regularly or cover the seed tray with a clear plastic dome or plastic wrap to create a mini greenhouse environment.
Proper Seed Treatment
Before sowing dahlia seeds, some gardeners recommend a seed treatment to enhance germination rates. One common method is to soak the seeds in room temperature water for 24 hours prior to planting. This initial hydration can soften the seed coat and expedite the germination process. Another option is to scarify the seeds gently using sandpaper or a nail file to create tiny abrasions on the seed coat, which can enhance water penetration and hasten germination.
Remember: Dahlia seeds are relatively small and fragile, so handle them with care during the seed treatment process.
Caring for Seedlings
Once your dahlia seeds have germinated and the seedlings have emerged, it’s crucial to provide them with proper care. Keep the seedlings in a warm, well-lit area with indirect sunlight. Avoid placing them in direct sunlight, as it can scorch their delicate leaves. Water the seedlings gently and ensure the soil remains consistently moist, but not waterlogged.
As the seedlings grow, thin them out if overcrowding occurs, allowing for adequate space for each plant to develop. This will help prevent competition for light, water, and nutrients.
With the right balance of temperature, moisture, and proper seed treatment, your dahlia seeds will germinate and flourish into healthy seedlings, ready for transplanting into individual containers or the garden.

| Factors for Successful Dahlia Seed Germination | Recommended Conditions |
|---|---|
| Temperature | 70°F – 75°F (21°C – 24°C) |
| Moisture | Consistently moist, but not waterlogged |
| Seed Treatment | Soaking or scarification |
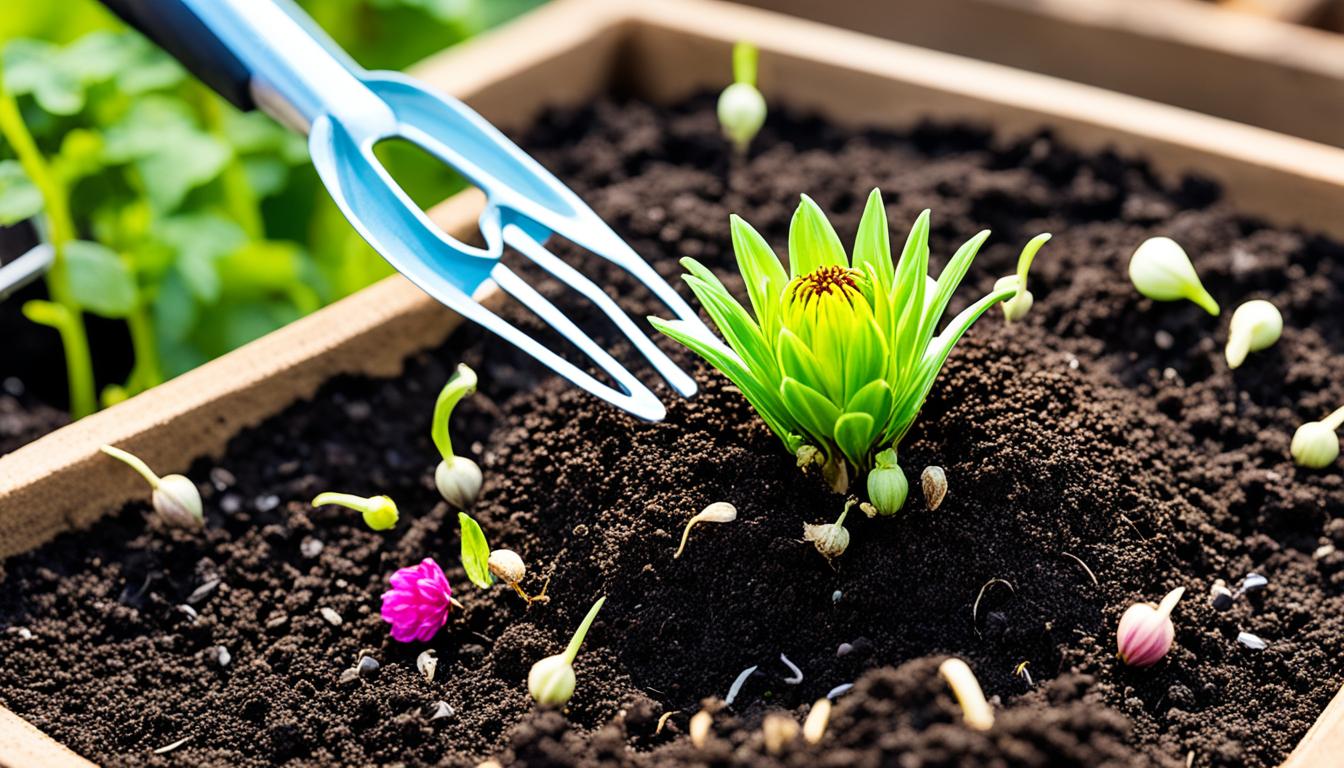
Transplanting Dahlia Seedlings
Once your dahlia seedlings have sprouted and developed a few sets of true leaves, it’s time to transplant them into individual pots or containers. Transplanting helps provide the seedlings with more space for their roots to grow, promoting their continued growth and development. Here’s a step-by-step guide on how to safely transplant your dahlia seedlings:
- Prepare your pots or containers: Use clean and sterilized pots or containers that have drainage holes at the bottom to prevent waterlogging. Fill them with a well-draining potting mix, specifically formulated for seedlings.
- Make a hole for transplanting: Create a hole in each pot that is deep enough to accommodate the seedlings’ root system. Ensure the hole is wide enough to comfortably fit the roots without crowding or bending them.
- Gently remove the seedlings: Carefully loosen the soil around the seedlings’ base, using a small garden trowel or your fingertips. Hold the seedling by its leaves or the base of its stems, avoiding excessive handling of the delicate roots.
- Place the seedlings in the pots: Lower the seedlings into the prepared holes, positioning them at a depth that covers the stems up to the first set of leaves. Pat the soil gently around the seedlings to secure them in place.
- Water thoroughly: After transplanting, give your seedlings a good watering to settle the soil and help them establish in their new pots. Avoid overwatering, as excessively wet soil can lead to root rot.
Remember to place your newly transplanted seedlings in a well-lit area, such as a sunny windowsill or under grow lights. Monitor their progress closely and provide regular care, including watering and feeding, to support healthy growth. Once the risk of frost has passed and the seedlings are well-established, you can transplant them into your garden or outdoor containers for their full growth and flowering.
Benefits of Transplanting Dahlia Seedlings
Transplanting dahlias seedlings offers various advantages:
- Proper root development: By transplanting the seedlings, you allow the roots to spread out and grow without any restrictions, promoting healthier plants.
- Individual care: Transplanting the seedlings into individual pots allows you to provide personalized care, including watering and fertilizing, based on each plant’s needs.
- Flexible placement: With potted seedlings, you have the freedom to move them around to find the ideal growing conditions, such as adjusting their exposure to sunlight or protecting them from extreme weather conditions.
- Easy monitoring: Transplanted seedlings can be easily monitored for any signs of pests, diseases, or nutrient deficiencies, allowing for timely intervention and treatment.
Now that you have learned how to safely transplant your dahlia seedlings, you can ensure their continued growth and prepare them for future success. With proper care and attention, your transplanted seedlings will thrive and bring an abundance of beautiful blooms to your garden or containers.
| Transplanting Dahlia Seedlings | Benefits |
|---|---|
| Use clean and sterilized pots or containers | Proper root development |
| Create a hole for transplanting | Individual care |
| Gently remove the seedlings | Flexible placement |
| Place the seedlings in the pots | Easy monitoring |
| Water thoroughly |
Note: The table above summarizes the key steps and benefits of transplanting dahlia seedlings.

Caring for Dahlia Seedlings
Proper care is essential for the healthy growth of dahlia seedlings. In this section, we will cover important aspects of caring for your seedlings, including watering, feeding, and providing adequate light. We will also discuss common issues and how to address them to ensure strong, vigorous plants.
Watering
Watering is crucial for the development of dahlia seedlings. It’s important to provide consistent moisture without overwatering. Keep the soil evenly moist, but be careful not to let it become waterlogged. Overwatering can lead to root rot and other diseases.
To determine if your seedlings need watering, gently insert your finger about an inch into the soil. If it feels dry at this depth, it’s time to water. Use a watering can or a gentle, fine-mist sprayer to avoid disturbing the delicate seedlings.
Feeding
As dahlia seedlings grow, they will require nutrients to support their development. Start feeding your seedlings with a balanced, water-soluble fertilizer about two weeks after germination. Follow the instructions on the fertilizer packaging for the correct dosage and frequency of application.
Alternatively, you can use organic fertilizers such as compost or worm castings. These natural options provide slow-release nutrients and help build the soil’s fertility over time.
Providing Adequate Light
Proper lighting is crucial for the healthy growth of dahlia seedlings. Place your seed trays near a south-facing window or under fluorescent lights to provide adequate light intensity. Aim for 12 to 16 hours of bright, indirect light per day.
If natural light is insufficient or inconsistent, consider using grow lights. These artificial lights provide the necessary spectrum of light for optimal seedling growth. Place the lights a few inches above the seedlings and adjust their height as the plants grow.
Addressing Common Issues
Dahlia seedlings may encounter a few common issues during their growth. Here are some tips on how to address them:
- Pests: Use organic methods such as handpicking or spraying with insecticidal soap to control common pests like aphids or spider mites.
- Damping-off: To prevent damping-off, a fungal disease that causes seedling death, ensure good air circulation and avoid overwatering. Sterilize your containers before sowing seeds to prevent contamination.
- Leggy growth: If your seedlings become tall and weak, they may be stretching for light. Increase the light intensity or lower the grow lights closer to the seedlings to promote sturdy growth.
Remember, proper care is essential for the success of dahlia seedlings. By providing adequate moisture, nutrients, and light, you can ensure their healthy development and set the stage for beautiful, vibrant dahlias in your garden.

| Common Issues | Causes | Solutions |
|---|---|---|
| Pests | Aphids, spider mites | Use organic pest control methods |
| Damping-off | Fungal disease, overwatering | Ensure good air circulation, avoid overwatering, sterilize containers |
| Leggy growth | Insufficient light | Increase light intensity or lower grow lights |
Hardening Off Dahlia Seedlings
Before transplanting your dahlia seedlings into the garden, it’s important to gradually acclimate them to the outdoor conditions. This process, known as hardening off, helps prepare the seedlings for successful transplantation and reduces the risk of transplant shock. Here’s a step-by-step guide to help you harden off your dahlia seedlings:
- Choose the right time: Start hardening off your dahlia seedlings about a week or two before the last expected frost date in your area. This usually happens in spring.
- Begin with short exposure: Place your seedlings in a sheltered spot outdoors, such as a covered patio or under a shade cloth. Start with just a few hours of exposure to the outdoor conditions each day. Gradually increase the exposure time over the course of a week.
- Protect from extreme weather: Keep a close eye on the weather forecast during the hardening off process. If there’s a chance of frost or extreme temperature fluctuations, bring your seedlings indoors or provide them with temporary protection.
- Adjust sunlight exposure: During the hardening off period, gradually expose your seedlings to increasing amounts of direct sunlight. Start with indirect light and gradually move them into full sun over the course of a week.
- Gradually increase wind exposure: Wind can be a challenge for young seedlings. Start by placing them in a sheltered spot and gradually expose them to gentle breezes. This will help strengthen their stems and prepare them for outdoor conditions.
- Monitor watering: Pay close attention to the moisture level of the soil during the hardening off period. Seedlings may dry out faster outdoors due to increased wind and sun exposure. Water as needed to keep the soil evenly moist.
Remember, the key to successful hardening off is gradual exposure. By gradually exposing your dahlia seedlings to the outdoor conditions, you allow them to adapt and minimize the risk of shock or stress. Take your time and be patient, as this process will help ensure stronger and healthier plants in your garden.
Once your dahlia seedlings have successfully completed the hardening off process, they are ready to be transplanted into the garden. The next section will guide you through the steps of planting your dahlia seedlings for optimal growth and blooming.

Planting Dahlia Seedlings in the Garden
Once your dahlia seedlings are hardened off, it’s time to plant them in the garden. Follow these step-by-step instructions to ensure optimal growth and blooming of your dahlias.
-
Prepare the soil: Choose a well-draining location in your garden with full sun exposure. Dig a hole that is wide and deep enough to accommodate the root ball of your dahlia seedling.
-
Space the plants: Leave enough space between each dahlia seedling to allow for proper airflow and prevent overcrowding. The exact spacing will depend on the variety of dahlias you are growing, so refer to the seed packet or plant tag for specific recommendations.
-
Plant your dahlias: Gently remove the seedling from its container, being careful not to damage the roots. Place the seedling in the prepared hole, making sure that the crown (the area where the stem meets the roots) is level with the soil surface. Backfill the hole with soil, firming it gently around the seedling to eliminate any air pockets.
Don’t forget to label your dahlias with their respective names or colors to keep track of the different varieties in your garden.
Pro Tip: If you’re planting multiple rows of dahlias, consider creating a planting plan to ensure a visually appealing arrangement of colors and heights.
After planting, water your dahlias thoroughly to promote root establishment. Provide regular watering throughout the growing season, aiming for consistent moisture without waterlogging the soil.
Dahlia Planting Guidelines
| Dahlia Variety | Spacing | Planting Depth |
|---|---|---|
| Pompon Dahlias | 12-18 inches (30-45 cm) | 1-2 inches (2.5-5 cm) |
| Decorative Dahlias | 18-24 inches (45-60 cm) | 4-6 inches (10-15 cm) |
| Cactus Dahlias | 24-36 inches (60-90 cm) | 4-6 inches (10-15 cm) |
Next Steps
Your dahlia seedlings are now planted in the garden, and with proper care, they will soon reward you with beautiful blooms. In the next section, we will discuss essential care and maintenance tasks to ensure the health and vitality of your dahlias.

Dahlia Care and Maintenance
Now that you’ve successfully grown your dahlias from seed, it’s important to provide them with the care they need to thrive. Proper maintenance ensures healthy and bountiful dahlias that will bring beauty to your garden. In this section, we will discuss essential care practices, including watering, fertilizing, staking, and managing pests and diseases.
Watering
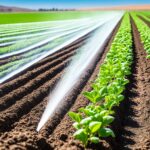
Watering is a crucial aspect of maintaining healthy dahlias. These plants require regular and consistent moisture, especially during the growing season. However, it’s essential to strike a balance and avoid overwatering, as excessive moisture can lead to root rot.
Monitor the soil’s moisture level and water your dahlias when the top inch feels dry to the touch. Aim to provide about 1-2 inches of water per week, either through rainfall or manual irrigation. To prevent waterlogged soil, ensure proper drainage by incorporating organic matter into the planting area.
Fertilizing
Proper fertilization helps promote vigorous growth and abundant blooms in dahlias. Before planting, it’s beneficial to amend the soil with organic matter, such as compost or well-rotted manure, to provide essential nutrients.
During the growing season, feed your dahlias every 4-6 weeks with a balanced fertilizer. Choose a fertilizer with equal ratios of nitrogen, phosphorus, and potassium (e.g., 10-10-10). Apply the fertilizer according to the package instructions, ensuring not to exceed the recommended amounts. Avoid fertilizing too late in the season, as it may stimulate excessive foliage growth instead of focusing on flower production.
Staking
Dahlias are known for their tall and vigorous growth, which can be prone to flopping or bending under the weight of their blooms. Staking provides necessary support to keep the plants upright and prevent damage.
Install stakes or plant supports at the time of planting or before the plants reach a height of 12-18 inches. Drive the stakes into the ground near the base of the plants, spaced evenly around the clump. As the dahlias grow, gently tie the stems to the stakes using soft plant ties or garden twine, ensuring not to constrict their growth. This practice will help maintain an attractive and upright display.
Managing Pests and Diseases
Like any plants, dahlias can be susceptible to pests and diseases. Regular monitoring and prompt action are crucial for effective management.
Common pests that may affect dahlias include aphids, slugs, and snails. Monitor the plants regularly for any signs of infestation, such as yellowing leaves or distorted growth. If detected, employ appropriate control measures, such as organic insecticidal soap for aphids or handpicking for slugs and snails.
Dahlia diseases, such as powdery mildew or botrytis blight, can also pose a threat. Ensure good air circulation around the plants by spacing them adequately. Remove any infected leaves or stems promptly and dispose of them to prevent the spread of diseases.
“Proper care practices, including watering, fertilizing, staking, and pest management, are essential for maintaining healthy and vibrant dahlias to enjoy throughout the season.”
By following these care practices, you can ensure that your dahlias continue to flourish and provide you with stunning blooms. Remember to water consistently, fertilize regularly, stake when necessary, and address any pest or disease issues promptly. With proper care and maintenance, your dahlias will reward you with their beauty and bring joy to your garden.
| Common Care and Maintenance Tasks for Dahlias | Recommended Frequency |
|---|---|
| Watering | Regularly, when the top inch of soil feels dry |
| Fertilizing | Every 4-6 weeks during the growing season |
| Staking | At the time of planting or before reaching a height of 12-18 inches |
| Pest and disease management | Regular monitoring and prompt action as needed |
Harvesting Dahlia Seeds for Future Propagation
Once your dahlia plants have bloomed, it’s time to harvest their seeds for future propagation. Collecting and storing dahlia seeds is a simple and rewarding process that ensures a continuous cycle of beautiful dahlias in your garden.
Collecting Dahlia Seeds
To collect dahlia seeds, wait until the flowers have faded and the petals have fallen off. You will notice a green, bulbous structure known as the seed pod or seed head. Using a pair of clean, sharp scissors or pruners, carefully cut the seed pod from the plant, ensuring not to damage the seeds inside.
Place the seed pod in a paper bag or envelope and allow it to dry in a cool, dry location for several weeks. The pod will gradually dry out and turn brown as the seeds mature.
Extracting and Storing Dahlia Seeds
Once the seed pod is fully dry, gently crush it with your fingers, releasing the dahlia seeds. Separate the seeds from any remaining debris or chaff using a fine sieve or mesh strainer.
After separating the seeds, store them in airtight containers such as small glass or plastic jars. It’s essential to label each container with the dahlia variety and the date of harvest for future reference.
Place the labeled containers in a cool, dark, and dry location, such as a pantry or refrigerator, to preserve the viability of the seeds. Ensure the containers are sealed tightly to prevent moisture and air from entering.
By following these simple steps, you can harvest and store dahlia seeds for future propagation. With a collection of seeds from your own plants, you’ll have the freedom to experiment with different dahlia varieties and expand your garden year after year.
| Benefits of Harvesting Dahlia Seeds |
|---|
| 1. Cost-effective way to propagate dahlias. |
| 2. Allows you to preserve unique and heirloom dahlia varieties. |
| 3. Provides an opportunity to experiment with cross-pollination. |
| 4. Enhances your gardening skills and knowledge of dahlia propagation. |
Harvesting dahlia seeds not only saves you money but also gives you the satisfaction of growing your own plants from seed. Start collecting seeds from your blooming dahlias and embark on a journey of endless possibilities in your garden.
Follow us on Pinterest for more gardening inspiration and tips: GardenPlantSeed. Join our community of garden enthusiasts today!
Conclusion
In conclusion, if you’re looking to add a touch of natural beauty to your home, growing dahlias from seed is the perfect way to do so. Not only is it a rewarding and enjoyable process, but it also allows you to experience the wonders of nature up close and personal. And with the comprehensive step-by-step guide provided in this article, you have all the information you need to successfully propagate dahlias and create a stunning display of vibrant blooms.
From choosing the right dahlia seeds for propagation to starting them indoors, germinating the seeds, transplanting the seedlings, and caring for their growth, each step has been meticulously outlined to ensure your success. By following these instructions, you can confidently cultivate healthy dahlias that will brighten up your garden and bring joy to your heart.
So, why wait? Start your journey into the world of dahlia propagation today and witness the magic of watching these beautiful flowers blossom from seeds. With a little patience, care, and the best way to grow dahlias from seed, you’ll soon be reaping the rewards of your efforts and enjoying the breathtaking beauty that dahlias can offer.