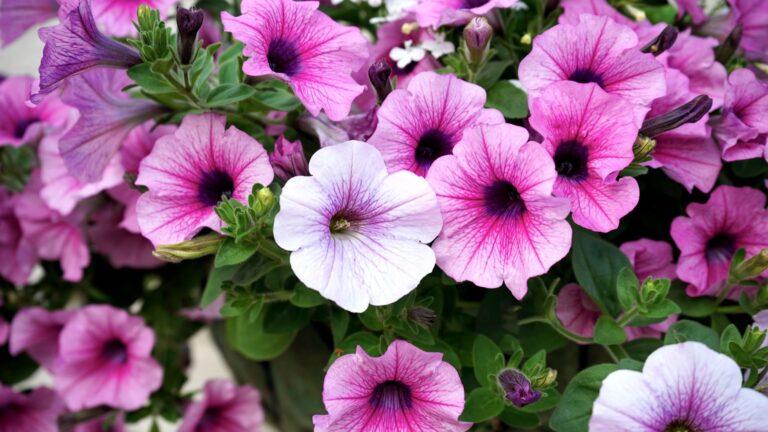
Refrigerating certain seeds triggers a natural cold period that helps them break dormancy and sprout reliably. Seeds like milkweed, lavender, lupine, coneflower, columbine, primrose, trillium, peony, hardy hibiscus, and pasque flower respond best after a chill. The fridge provides a controlled, moist cold treatment called cold stratification. Proper prep boosts germination rates and shortens the wait for seedlings. With straightforward steps, household refrigeration can mimic seasonal conditions these seeds need.
What Cold Stratification Does
Cold stratification gives seeds the cool rest they need before they wake up and grow. You help them by copying winter’s chill, so their dormancy mechanisms relax and let growth begin.
During this pause, hormonal changes shift inside the seed, and those signals tell it the cold season has passed. That matters because some seeds won’t sprout until they sense that safe, steady cue.
You’re not forcing anything; you’re simply giving nature the nudge it expects. As a result, the seed can open at the right time, instead of sitting stuck and unsure.
Once you understand this process, you can feel more confident and connected to the plants you’re raising. It’s a small act, but it builds trust between you and your garden.
10 Cold Stratification Seeds to Refrigerate
Once you’re ready to wake up seeds that need winter’s signal, the refrigerator becomes your quiet helper.
You can give cold stratification seeds a steady chill to break seed dormancy and meet the right temperature thresholds.
Consider stubborn favorites like milkweed, lavender, lupine, coneflower, columbine, primrose, trillium, peony, hibiscus, and pasque flower.
These plants often wait for a cold season before they sprout, so your cool shelf helps them feel at home.
Whenever you refrigerate them, you’re not forcing growth. You’re inviting it.
That simple step can turn hesitation into action and help your garden crew join you more confidently.
Keep them labeled, tucked in moist medium, and out of the freezer so they stay safe and ready.
How Long to Chill Each Seed
How long you chill each seed depends on two simple things: the basic cold period most seeds need and the exact timing that works best for that plant.
Some seeds only need a few weeks, while others want much longer, so checking the species helps you avoid guessing games and wasted patience.
Once you match the chill time to the seed, you give it a better shot at waking up strong and ready to grow.
Chill Duration Basics
Whenever you chill seeds, timing matters more than you might expect, because each plant has its own rhythm. You’re helping seed dormancy loosen, so the cold period can wake growth without rushing it. Most seeds respond whenever you keep them cool and steady, since chilling mechanisms need time to signal that winter has passed.
For you, the goal isn’t to guess wildly. It’s to give each batch enough cold exposure for the coat and embryo to reset. Too little time can leave seeds stubborn, and too much can stress them. So, stay patient, label your packets, and track the days. That simple habit keeps you in control and makes the process feel less mysterious.
Seed-Specific Timelines
Some seeds need only a short chill, while others ask for a much longer rest, and that difference matters more than many new gardeners expect. You’ll see each seed’s dormancy mechanisms respond to cold in its own way, so check the packet or trusted guide before you start. Whenever you match the right timeline, you help the seed notice its germination cues and wake up with less stress.
- Delphinium and columbine often need 2 to 4 weeks.
- Milkweed and lavender might ask for 3 to 6 weeks.
- Peonies and many native wildflowers can require 6 to 12 weeks.
You don’t have to guess alone. Start with the seed type, then count the chill time like a kind little promise. That steady care helps your seeds feel ready, and you’re part of that calm, shared rhythm.
How to Prep Seeds for the Fridge
Before you slide seeds into the fridge, give them a quick, careful prep so they don’t dry out, rot, or get lost in the shuffle. Start with clean, labeled bags or jars, then check each batch for seed scarification needs, since a hard coat can slow cold treatment. Next, use moist vermiculite, peat, or a paper towel, and keep moisture control steady, not soggy.
| Step | What you do | Why it helps |
|---|---|---|
| Sort | Separate each seed type | Keeps timelines clear |
| Prep | Scarify in case needed | Lets water in |
| Pack | Add damp medium | Protects seeds evenly |
| Label | Name and date each batch | Helps you stay organized |
Keep containers sealed, but not dripping. That way, your seeds feel cared for, and you’ll join the small club of growers who keep things simple and steady.
How to Sow Seeds After Stratification
Once your seeds finish cold stratification, sow them right away so they can use that wake-up call while it’s still fresh. You’ve already helped them rest, and now it’s time to welcome them back into warm soil with care.
Set each seed at the right planting depth, then cover it lightly so it can push upward without strain. Keep the mix evenly moist, not soggy, because gentle moisture supports steady seedling care. Place the tray or pot where it gets the light and warmth it needs, and check it daily.
- Use a clean container with drainage.
- Label each row so you stay organized.
- Mist the surface whenever it starts to dry.
Aster Seeds That Need Chilling
Some aster seeds need a cold spell before they wake up, so you’ll want to give them chilling time that matches the variety you’re growing.
In case you keep them cold for the right stratification duration, you help break their dormancy and set them up for better sprouting.
After chilling, sow them right away in moist soil, because that fresh start gives your seeds the best chance to grow strong.
Aster Seed Chilling
Aster seeds often need a short cold period to wake up and start growing, and that step can make all the difference whenever you want strong, healthy seedlings. Whenever you give them that chill, you support aster germination and respect their cold requirement without fuss. You’re simply helping nature do its thing, and that feels pretty good.
- Place seeds in moist medium.
- Keep them cool in the refrigerator.
- Check that the mix stays lightly damp.
After chilling, sow them in fresh soil and give them steady light. You’ll feel right at home watching tiny sprouts appear, because each one shows your care paid off. With a little patience, your asters can join your garden crew and brighten your space with ease.
Stratification Duration
Whenever you’re figuring out how long to chill aster seeds, the sweet spot matters more than you could suppose. Most aster seeds do best with 30 to 60 days in the fridge, and that range fits many seasonal timing strategies. Should you go shorter, germination can stay stubborn. Should you go much longer, perhaps you will not gain much more.
| Chill time | Best use |
|---|---|
| 30 days | Mild cold needs |
| 40 days | Reliable middle ground |
| 50 days | Stronger dormancy break |
| 60 days | Cool, steady results |
| Over 60 | Usually unnecessary |
You’ll hear cold stratification myths that promise one magic number, but your seeds prefer balance, not drama. So, feel free to relax, trust the window, and join other gardeners who’ve learned that a patient chill often brings the most confident spring start.
Sowing After Chilling
Once the seeds have had their chill, bring them out and move them into fresh, moist seed-starting mix right away. You’re helping them wake up, and that quick shift matters.
For post chill planting, set each aster seed on top of the mix, then press it in lightly. Cover only provided the packet says to, because many aster seeds need light to sprout. Keep the tray in a bright spot with steady warmth.
- Mist the surface so it stays damp, not soggy.
- Label the tray so you can stay organized.
- Begin germination monitoring each day for tiny green loops.
When sprouts show, give them air and light so they grow strong together. With a little care, you and your asters can start this next step with confidence.
Lavender Seeds That Need Cold Stratification
Lavender seeds often need cold stratification because their hard seed coats can keep them from sprouting on their own, and that can feel frustrating just as you’re keen to grow those soft, fragrant plants.
Whenever you handle lavender propagation, you help seed dormancy end through giving the seeds a chilly rest in the fridge for a few weeks. That pause tells them winter has passed, so they’re more ready to wake up.
You can place them in a damp paper towel or fine seed mix, then seal them in a bag so they stay cool and lightly moist.
After chilling, sow them shallowly and keep the soil steady and warm. Provided you stay patient, you give your lavender a better chance to join your garden crew with confidence.
Milkweed Seeds That Need Refrigeration
Milkweed seeds can be picky too, and they often need a cold rest in the fridge before they’ll wake up and grow.
You can tuck them into a damp paper towel or sealed bag, then let them sit for a few weeks. This simple chill copies winter in the milkweed habitat, so your seeds feel ready for spring. If you do this, you help support seed dispersal from your garden into a friendly space for monarchs and other pollinators.
- Label the bag so you don’t mix it up.
- Keep the towel damp, not soggy.
- Check for tiny roots before sowing.
With a little patience, you’ll give your milkweed seeds the gentle nudge they need to join your growing patch.
Echinacea Seeds That Need Cold Treatment
Echinacea seeds often need cold treatment before they wake up and sprout, so you can give them the chill they expect in nature.
This cold stratification helps soften their slow start and can lead to steadier germination.
Should you time sowing well, you’ll give your seeds the best chance to grow strong once spring warmth arrives.
Echinacea Cold Stratification
Getting echinacea seeds to sprout often starts with a simple cold rest that tells them winter has passed and it’s time to wake up. You can mimic that pause in your fridge, and you’ll help the seeds feel at home.
Echinacea biochemistry responds to chill, which softens dormancy and nudges growth. Garden folklore calls this a tiny winter nap, and honestly, that image helps you stay patient.
Place the seeds in damp medium, seal them gently, and keep them cool for several weeks.
- You’ll see a quiet, shared start for each seed.
- You’ll smell damp soil and feel hope build.
- You’ll notice stronger, more even sprouting later.
Optimal Sowing Timing
After the cold treatment, timing your sowing matters just as much as the chill itself. You’ll get the best start once you sow echinacea seeds in early spring, right after the last hard frost, or in late fall provided your planting calendar fits natural winter cold.
That gives you prime timing because the seeds can wake up with steady warmth and moisture, not a sudden freeze or hot spell. Should you have started the chill indoors, move them to trays or beds as soon as the soil feels workable.
You’ll feel more confident whenever you match sowing with your local weather, because your seedlings won’t have to fight the season alone. Whenever you time it well, you join the rhythm that helps strong plants grow.
Troubleshoot Slow or No Germination
Whenever your seeds seem stuck, don’t panic, because slow sprouting is often a clue, not a dead end.
Check the basics initially: should the soil temp stays too cold or too warm, your seeds might pause. You’ll also want steady moisture, because soggy mix can suffocate them, while dry mix leaves them waiting. In case you’re starting indoors, match light exposure to the seed’s needs after sowing.
- Gently lift one seed to see whether it softened or rotted.
- Keep the tray evenly moist, not muddy.
- Move the container to a spot with proper warmth.
Then give them more time. Cold-stratified seeds can wake slowly, and your patience helps them feel at home.
Should several still fail, reseed fresh stock and tweak one thing at a time.
Frequently Asked Questions
Can I Use a Freezer Instead of a Refrigerator?
No, you shouldn’t use a freezer instead of a refrigerator. You’ll risk freezing seeds, which damages viability. Keep them cold, not frozen, and use temperature monitoring so you stay confident and part of the growing community.
Do All Seed Packets Require Cold Stratification?
No, you don’t need to chill every packet; it’s a mixed garden, not a single choir. You’ll find dormancy mechanisms and species exceptions, so check labels and join the right sowing tribe.
Should Seeds Be Stratified in Soil or Paper Towels?
You’ll usually stratify seeds in moist soil or a damp mix, not paper towels. Soil stratification helps maintain moisture balance and gives you a snug, natural setup, so you feel confident nurturing seeds together.
Can I Stratify Seeds After Mixing Them With Fertilizer?
No — you shouldn’t; fertilizer can cause seed contamination and nutrient burn during chilling. About 70% of gardeners prefer clean stratification, so you’ll fit right in once you rinse seeds and stratify them separately for safer, better results.
Does Soaking Seeds Replace Cold Stratification?
No, soaking doesn’t replace cold stratification; you’re helping some seeds hydrate, not break seed dormancy. Use the right soak duration, then chill them as needed, and you’ll join gardeners who give seedlings their best start.